Thursday, May 26, 2016

BCA Clay Days!

It was a total pleasure this week to take my third through fifth graders across the street to Burlington City Arts to throw pottery on the wheels!


Each class had this experience thanks to our fantastic Edmunds PTO fundraising to make the trip possible.  Students arrived excited to get their hands dirty and hear expert clay teachers at BCA give how-to's on the basics of throwing on a wheel.

Students practice their "crab claws" to pinch and pull up the side walls with teacher Alissa Faber
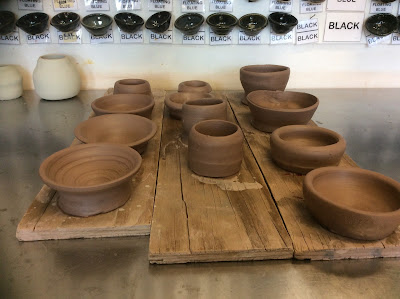
Most of my students have been here before- it's an annual school tradition.  This year students could choose to make a basic vessel, such as a cup or bowl. One student made a flower pot, and there were a few vases in the mix as well.


Centering clay is by far the hardest part, so students arrived to pre-centered clay lumps at their wheel, from which they could alter the piece.

Pulling the floor of a bowl.  And such steady, strong posture for throwing!
Every single student made a finished piece. These will be returned to our artists in a couple weeks after they are fired.

You can tell from kids' posture how totally rapt their attention is on BCA teacher Kate.
Students were excellent guests in the space- engaged, polite, respectful of the hundreds of fragile artworks drying on shelves all around them.


This short video really shows how laser-focused artists were. 
What a treat for all of us to go!


A BIG THANK YOU to BCA staff and the Edmunds PTO for making our field trip possible!


Sunday, May 22, 2016

Amazing Printed Animal Portraits- EES grade 5


Rawr!
Have you ever asked a group of kids what printing is?

Well, given where we are technologically in this world, this is a pretty good answer, actually. It would be pretty weird and surprising if kids started shouting out terms like "linocut" or "lithography," because this isn't a hundred years ago. All of the above, however, fit into the same category- images that can be reproduced multiple times. All of those prints can be nearly identical, or they can change in positioning and colors.

Squids

When you dig into it, though, printing is basically this:
Splat!
Distilling printmaking down to a handprint is really useful for my students. It helps them understand that anything, really, can be printed, whether it is a leaf or a string or a potato.


Suddenly, (and sadly, just as they are outgrowing being my students) my fifth graders really, really get it. And they are loving printmaking so much that they are begging to stay in at recess to do more. (Disclaimer: I cave easily at this. Who wouldn't indulge kids who want more art in their free time?!)


 This print post needs a shout out and a thank you to Mr. Stoller at Thomas Elementary Art for the amazing lesson idea. This is truly the best styrofoam printmaking lesson that I have ever done with elementary kids, and are definitely on a level to compete head-to-head with carved linoleum or vinyl works (and minus all of the hand-stabbing that comes from sharp cutting tools.)


 These sweet prints began with drawings that the kids made. We discussed portraiture and focused on the head and shoulders of a favorite animal. Students were encouraged to both draw from their imaginations and also use visual resources such as animal encyclopedias.

Pulling a print. Magic!
 After students drew their animals, they printed the outline in a warm color on two papers. We talk about outline basically being the same thing as perimeter, which helps kids grasp what I am asking for. Another way to show outline is to ask kids to think about cookie cutters.

 Next, students added details to their animals, and cut away the background styrofoam.  The animal was printed in a cool color, right on top if the first prints, as you see above.  Here are a few examples of what they looked like at that stage:


Yup, the work looked amazing at this point, but it is the final highlight color that really brought the "wow" effect. Students cut out a part of the animal that they wanted to print in a third color layer, and rolled ink onto it separately from the other pieces, and printed it a final time.


Because putting lots of brains together on an idea yields better results than thinking solo, students proposed that their prints have different highlighted areas on different prints. I loved this idea, and it helped really bring to life the prints as diptychs, like the elephants near the top of this post, and these puffins, below.


Elephants, you might have noticed by now, were a popular theme:


Here, the artist highlighted the spikes in both images, but the change in color is lovely:


Finally, we discussed the format printers (the humans kind, not the machine kind) use to label their artwork.  At the left of each print, artists wrote their series number (print number out of the total, such as the first of two in the edition, written as "1/2"). In the center, artists added a title, and on the right hand side, the work was signed.


These young artists took it very seriously, and felt quite professional when they finished matting their prints on black paper.


You can buy art styrofoam designed for this use, or you can just save a tray from the grocery store, and make your own by cutting off curved sides and using the flat bottom.  Try out some printing magic soon!


Tuesday, May 10, 2016

Kindergarten Still-life and Science!

Most people probably don't think of the art room as a hot spot to teach science. That's a shame, since it can be easily integrated to most everything happening in here.  Kindergarten artists spent time learning about the parts of plants in art, using photographs, paintings, and real flowers to examine.


After being able to identify plant parts such as leaves, stems, petals, and seeds, we also discussed how to tell where in its life cycle a plant is. Does it have a bud, a big healthy bloom, or is it losing petals and drooping? Kindergarten artists can tell you what all of those signs mean for the plant. They also used that information to paint their own still-life of flowers. Students can also tell you about the job each plant part has- collecting sunlight, absorbing water, attracting pollinators, and so on.


One of the other ways that we used science in this project was experimenting with color. All of the students had access only to the primary colors in this project, and worked with a partner to discuss the colors they observed in each plant part, and tried out mixing their primaries to achieve a color match. As with any scientists, it took many of them a few tries.


Students used their knowledge to create works that had plants at varying parts of the life cycle.  In the picture below, lots of petals have fallen and landed on the table.  The upright, strong stems are fresher, and have more petals.


Students also learned to overlap their shapes to make it appear that their vase is truly sitting on the table, not floating above it.


Artists discussed different textile patterns that they could include for their table as well.


Our art process began in pencil with the vase and table, and then added the centers of the flowers (they noticed a lot of flowers have circular centers) with a handful of circles in varying sizes. On that same day, students mixed watered down paints to create the pale backgrounds, painting around the vase, table, and circles.


On the next day, artists mixed tempera paints to match each of the plant parts, beginning with the stems and leaves. After that, they used the color wheel to help mix browns for the seeds, and added the petals. Once the flowers were completed, students painted the vase and table.


 The science of plants! The mixing of the colors! These Kindergarten paintings are framers.