 |
| Paintings on foam core! |
 |
| So proud of his work! |
This lesson comes from the inspiring and awesome blog of Tricia Fuglestad, an force of innovation in art teaching. Previously, my students have had bad luck with copper tape- it rips easily, the edges are sharp, and the sticky side isn't always very conductive, so instead we used regular project wire.
 |
| A roomful of robots! |
 |
| No joke- a soldering iron is dangerous. I reteach it again and again, every day that it's in use. |
These bots brought out their competitive spirit, and they sounded like sportscasters calling the matches to see whose bot would fall down first.
They gave each other "prizes" in different categories. One in particular was rigged up be really loud (specifically designed by the maker with the idea of irritating his brother), so that one received the dubious honor of "Most Annoying."
 |
| Far and away the "Most Adorable and Sparkly" |
Some of the bots looked rather spidery... or maybe more like a millipede!
These kiddos did not want to go out to snack. Or to leave after class. Which is not surprising, since kids will even come in on their evening free time to be makers. They were completely absorbed, and each afternoon waved goodbye to their creations until the next morning.
Once students had a good handle on turning a motor on, I let them loose to build whatever they envisioned, but several had specific things they wanted to learn, especially how to use a motor to turn wheels.
 |
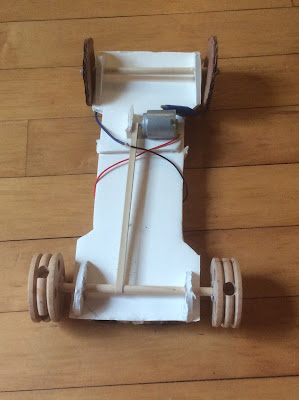
| Underside of my car |
 |
| Top of my car |
It's quite speedy too, and we have to generally run to catch them outside. Here's my little lowdown on making one:
We strapped a little bear on our, which my younger thought was hilarious, but try it with just about anything you can make out of cardboard or other sculpture materials to create different types of cars.
Off I go, headed to try my prototype going off the little ramp (made from a block and a book) my little guy just built- hope that bear's seatbelt is on tight!


No comments:
Post a Comment