Inside Burlington's Edmund's Elementary School Art Room, Burlington City Art's Summer programming, as well as formerly Richmond Elementary School's Art Room and Flynn Elementary's Project Explore Program.
By far, the most exciting news for the EES community that I could share is that we have a brand-new kiln! And here it is, a shiny thing of beauty!
After the first test firing, a perfect pyrometric cone tells me that it is ready for artwork. The kiln is in a space that is shared by the middle school as well, making pottery newly a K-8 experience for our students.
Truly a thing of beauty: a just-right temperature was met in the test firing of this cone.
This comes after years of fundraising, donations, and advocacy for the benefits of a clay program at EES, and another year of budgeting, engineering, and construction.
Thank you so much to all of the donors and Burlington Property Services staff who worked hard to support the EES and EMS art programs!
I cannot wait to get started right away, and our young artists could not be more excited!
This is the time of year when Kindergarten students are studying relative measures like weight. This art and science-integrated engineering lesson taught teamwork, failure, tenacity, and experimentation.
In the first class, students used materials that were on the heavier side to make a wire strand for our mobile, including big glass beads, large 1-2" buttons, and big painted cardboard shapes, among other options. This is good exercise in dexterity and fine motor development, too: artist practice using a pinching grip, use basic sewing skills to thread in and out of the holes in cardboard, and learn to twist the wire so that materials don't fall off.
For the second class, students used very light materials, including sections of bendy straws, sparkly burlap fabric, plastic beads, and faux flowers and leaves. Many students were finishing their strands from the first class, and added these light materials to the heavier strands, resulting in more medium weights.
On the second day, I asked students what they thought an engineer is. As you might imagine when posing this question to a group of five and six-year-olds, the first answers were that engineers drive trains. So true! They started there and delved deeper. Here are some of their thoughts:
"Engineers drive trains and switch the tracks around." (Cue train sounds from a dozen kids simultaneously!)
"Engineers fix the train when it is broken."
"Engineers can fix other stuff too, like cars."
"Some engineers build buildings."
"And some can even make bridges you can drive over."
After extended student discussion, I asked what all of their definitions of engineers had in common. These are the features students came up with linking all types of engineers:
"Engineers do hard stuff."
"They solve problems and fix things that break."
"Engineers make stuff."
They found out that in art class that day, they would all be engineers who did exactly those things- making stuff, solving problems, fixing things that broke, and working together when it got hard. I let them know that the most likely outcome would be a class time of experimentation, failure, excitement, and occasional disappointment, resulting most importantly in experience. I assured them that a "finished" mobile was the least important thing to achieve.
I hung a large, circular piece of foam core form the ceiling. Several like it have been kicking around my storage space for some time, waiting for me to figure out a good use for them. There are deep slits in towards the middle, just the right size for the strands. Additionally, I used an awl to poke lots of little holes in the surface for more hanging options.
The foam core was initially hung from a wire, lopsidedly. After students made their two strands, they began to add their strands to the foam core, causing it to shift from side to side. Students could adjust where they put their strand in an attempt to balance the foam core. The strands that were slid into the slits moved around as the mobile tilted, and frequently slid right out of the foam core and onto the floor. The idea was to see how each addition effected the whole- adding something too heavy to one side might cause the mobile to shift, dumping off the work a couple of other classmates had just added.
Now, you might think that the kids would be upset by having to start over. Many children were surprised, disappointed, and a little frustrated, while many others giggled and were excited when pieces fell. Not a single student expressed frustration at anyone else, and their pride and confidence grew the more they worked at it. They worked well as a team, communicated, and asked each other for help. After failing over and over to keep all of the pieces on the mobile, students found the balance right in the last minute of art class! They were so proud and thrilled.
Enjoy a little moment of peace as one of the finished mobiles spins!
Recently, a good friend was telling me about a fascinating problem she had encountered in her professional circles: first-year med students who utterly lacked the requisite fine motor skills, highlighted by the fact that they couldn't sew stitches. Not at all. The friend went on to explain that, lacking subjects like home-economics, most schools were no longer really preparing students with the early fine motor skills needed to lay the groundwork for training doctors.
Life skills, like sewing, are not something that kids should leave school without learning. Sewing used to be required, along with things like balancing a checkbook and a little basic cooking. That is why the Kindergarteners have a sewing table for choice time in art, and why my first graders just finished up sewing their first art class pillows.
Seeing the first grade pillows, some fourth graders mentioned having loved the sewing project, and wanted to know, could we sew again this year? "I love my pillow," said one boy, "and I still sleep with it in my bed."
Making artwork with a real, tangible product brings meaning and an enduring sense of success.
In this lesson students learn to thread a needle, trying techniques to smooth the thread to go though the needle's eye. They learn to pin multiple fabric layers, and to make stitches at regular spacing so that the stuffing doesn't fall out.
Students learn studio habits to carefully organize and keep track of their tools when they are using sharp objects, so that nothing gets left behind, so no one gets hurt by stepping on a pin or needle.
Many students added optional buttons or bows to the gorgeous fabrics, which were mostly upholstery textile samples donated by Burlington Furniture Company.
They have built pillows! And, along the way, they have built patience, concentration, self confidence, and dexterity, too.
A group of second graders recently had extra time on their hands in art class, and had the choice to either work in their sketchbooks or make miniature framed works of art. Anyone who was wavering was sold by the obvious joy of using glitter glue in their day.
The prompt to this little project was to honor something or someone you love by making a framed work. Whether by discussed mutual agreement or just lots of parallel thinking, there were lots and lots and lots of cats!
And lots of love for their families!
A closeup of one adored dad!
The whole family and some imaginary pets, too!
Students started with four popsicle sticks, and made designs and patterns on them with colorful permanent markers. Students glued paper to the back of the layered sticks, and added a ribbon across the top from which the framed work could be hung. It was an easy, fun way to make these second grade artworks feel formal and fancy!
Examples of fabrics from Uganda, Ghana, and India showed EES first graders how textile-makers use pattern in their work.
Block-printed fabric from India
The most fundamental feature of the patterns that students observed is that patterns repeat, which makes patterns very different from "designs" on clothing. A design is not bound to repetition, and might look like perhaps a smattering of shooting stars in a sky or a few fish swimming in the ocean, printed across a shirt.
At left, a star design, and at right, a star pattern.
First graders first examined their own apparel to look for designs, and then for patterns, finding lots of examples. Patterns were identified by the regularly spaced repeating images, such as squares for checks or circles for polkadots. Other patterns students found on their own clothes included stripes (straight and zigzagged), plaids, and florals.
With plenty of examples from both around the world and in their own classroom swirling in their minds, first graders used their sketchbooks to create two ideas for patterns of their own. Once they had drawn both, they selected one to draw again a piece of styrofoam, which served as a print plate.
On the first day of printmaking, students used their print plates to make five prints- one in each corner, and one in the center. The ink used is water-soluble, so the styrofoam plates were washed and dried for the next class period.
On the next day, students changed the color with which they were printing, rolling on the new ink for four more prints. Over the two printing classes, each student worked with one ink in a warm color and one in a cool color.
These artworks are each 12"x18" overall, made with 4"x6" printing plates.
Exploring the way artists design pattern is a step toward our next fabric project- this week, first graders will begin cutting and pinning fabric to sew their own pillows!
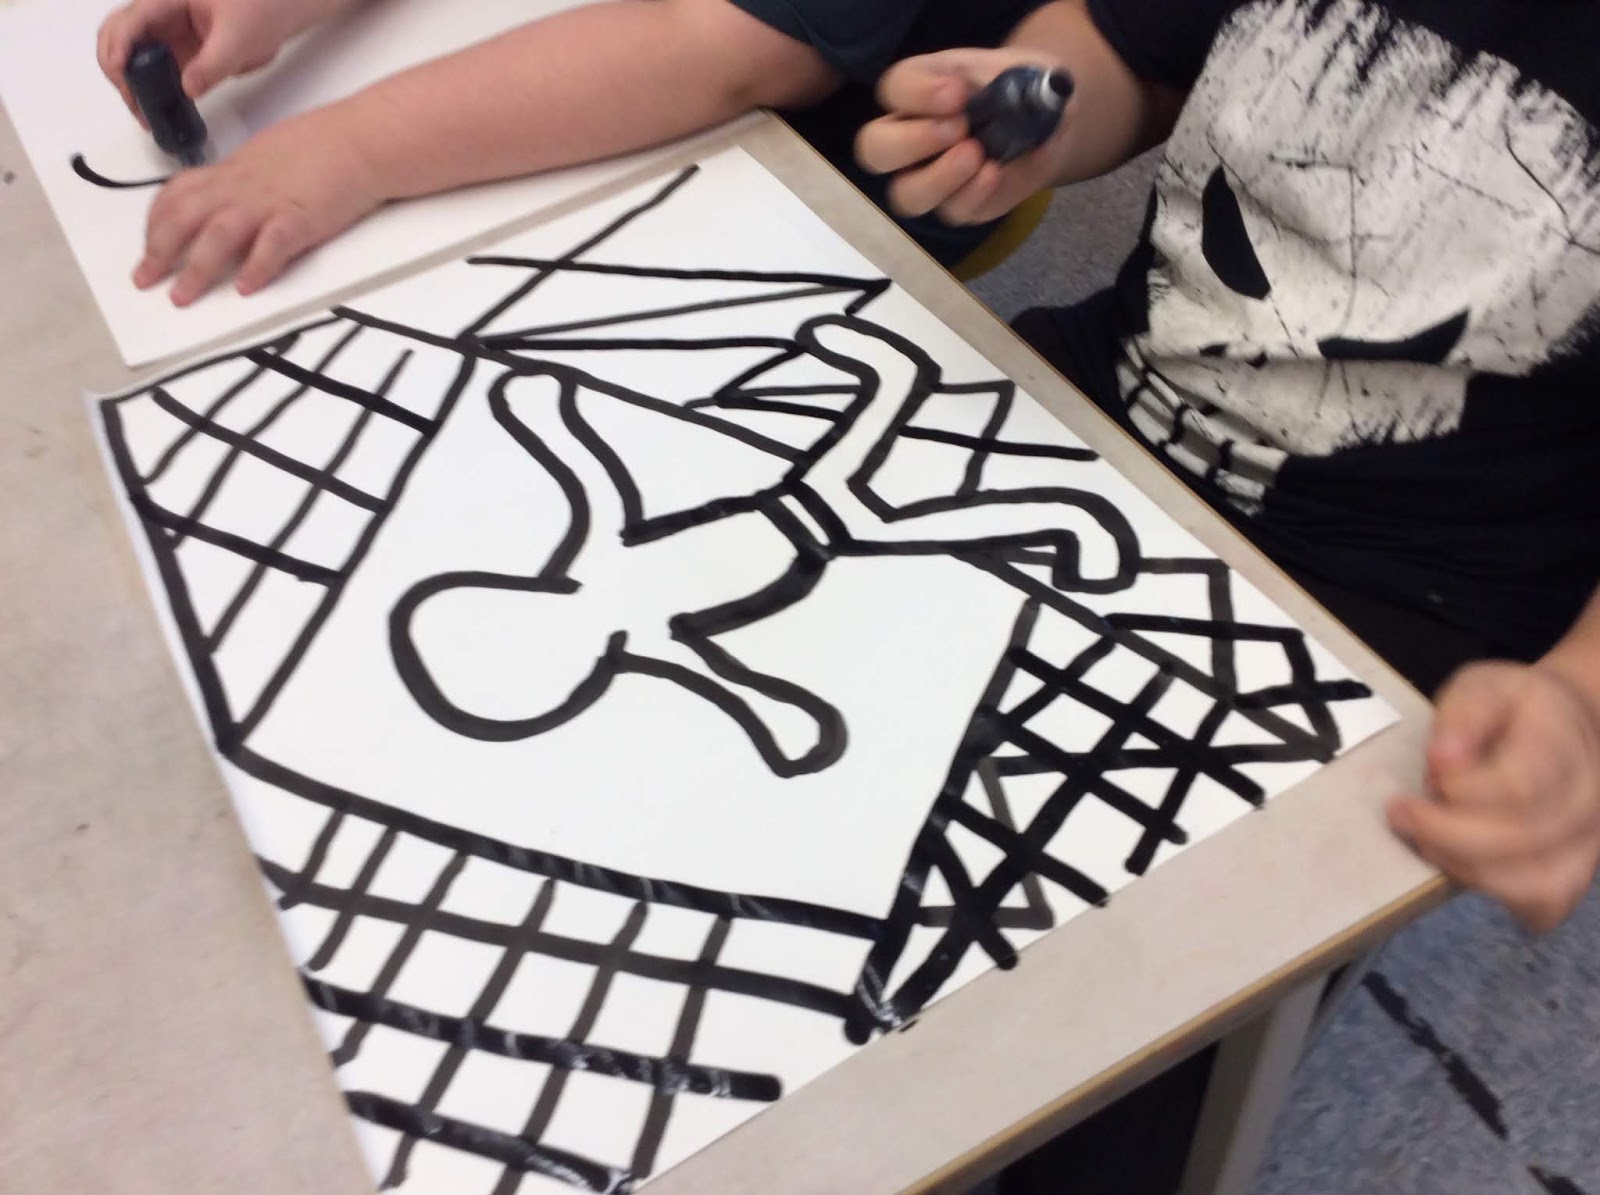
EES students have loved a new tool, the bingo dauber bottle. Thanks to the wide array of art teachers nationally who have shared their ideas on how to use them, I recently bought a couple of dozen to let students try them out..
Our bottles are filled with india ink, so the lines are very permanent and can be painted over. The wide mark of the sponge tip of the bottles begs for large paper, so students worked on 18"x24" drawing paper. Our drying racks are not big enough to accommodate such large work, so these paintings could be seen lining the tops of the lockers down our hallway.
Mr. Gillard's students looked at the artist Keith Haring, whose famous figural work was the inspiration for our classroom project.
Their learning goals in ink were to create some interpretation of a figure, to segment the background into 3-5 or more spaces, and to fill at least three of those spaces with a repeating pattern or design.
Students used color to create and enhance the themes of their work. The colors in the work above reinforce the excitement and energy of the figure.
This artist literally split the figure vertically into warm and cool color families. enhancing how the patterns changes across the work.
Look for these at our winter Fine Arts Night in February!
Artists in 2nd grade used ink bottles and watercolor to draw and paint vases of flowers on very large paper, 18" x24".
Students experimented with shape and composition. Some students chose to keep all of their flowers visible within the composition, while others chose to let the flowers crop off the edges of the paper, suggesting a bigger scene than the viewer can see.
Students looked at example vase shapes, and imagined the different lines they might use to make them. Some were rounded, others squared, and some had fancy curlicues.
Artists could choose to explore pattern in their artwork; the vase, the background, and the surface provided space for that experimentation with visual repetition.
The work was painted in liquid watercolors. Students were reviewing their knowledge of warm and cool color families, and made the backgrounds cool to help the foreground flowers pop forward visually.